When one thinks of the Middle Ages, sanitation rarely comes to mind. However, the evolution of garderobes, the medieval restrooms, is a riveting slice of history. Far from the contemporary toilets we’re accustomed to, garderobes were dedicated hygiene spaces, built into castle walls.
The Strategic Design of Garderobes
Contrary to popular belief, these restrooms weren’t mere holes in the ground or basic outbuildings. The affluent had the luxury of using a garderobe, a small room abutting the castle walls. The term “garderobe” stems from the French “wardrobe,” referring to an astonishing practice: occupants would hang their clothing in this shaft to rid them of fleas, using the ammonia from urine.
Toilets with Multiple Roles
The design of these medieval restrooms harbored another purpose. Occasionally, daring soldiers would try infiltrating castles through garderobe shafts. Thus, these toilets turned out to be strategic defense points, but also vulnerable zones. History even records several renowned figures meeting their demise on the loo, ambushed from below.
Transitioning to Modernity
While the concept of flushing toilets might seem ancient, the first modern restroom wasn’t introduced until 1596 by Sir John Harrington. Despite this groundbreaking invention, it would take nearly another 250 years for the idea to gain widespread adoption.
Conclusion
Garderobes, testaments to medieval ingenuity, remind us that innovation isn’t a recent phenomenon. Whether for hygiene or defense strategy, these medieval toilets showcase the creativity of our ancestors. For creative, innovative and useful products, visit www.lalema.com
Keywords: Garderobe, medieval toilets, castles, Middle Ages, Sir John Harrington, modern restroom, history of toilets, medieval defense, Middle Ages sanitation.
Workplace safety is paramount, especially in sectors where the risk of injury is high. According to ASSTSAS, in the province of Quebec, falls and slips contribute to a staggering 18% of workers’ compensation costs. Alarmingly, this ranks as the third leading cause of workplace accidents in the health and social services sector, encompassing a wide range of job roles.
Understanding the Causes of Workplace Accidents
Before delving into solutions, it’s crucial to understand the root causes of these accidents. While falls and slips are significant contributors, several other factors play a role in workplace-related mishaps:
Fall and Slide Accidents: These can be attributed to wet floors, uneven surfaces, or obstacles in pathways.
Muscle Strains: Often a result of improper lifting techniques or excessive flexion, leading to back and muscle injuries.
Chemical Exposures: Handling chemicals without proper precautions can result in eye and skin lesions.
Respiratory Issues: Prolonged exposure to certain chemicals and equipment can adversely affect the respiratory system.
Electrical and Biological Hazards: Accidental contact with live wires or exposure to biological hazards can have severe consequences.
Seven Proactive Measures to Enhance Cleaning Safety
To mitigate these risks, especially in cleaning tasks, consider the following seven steps:
Regularly Review Work Methods: Periodically assess and update working methods and procedures to ensure they align with the best safety practices.
Risk Assessment: Proactively identify and evaluate situations that pose risks. This includes lifting heavy loads, repetitive tasks, exposure to harmful chemicals, assessing air quality, and overall work organization.
Use Personal Protective Equipment (PPE): Recognize tasks that necessitate PPE. This can range from gloves and goggles to masks and protective sleeves.
Opt for Non-slip Footwear: Especially crucial when working with floor finishes. Non-slip shoes can significantly reduce the risk of falls.
Use Wet Floor Signs: Always use “wet floor” safety panels when cleaning floors. Ensure they are removed once the floor is dry to avoid confusion.
Regular Equipment Inspection: Pay special attention to the electrical wiring of cleaning equipment. Avoid disconnecting devices by pulling on the wire.
Handle Biological Hazards with Care: Treat any body fluid or blood as a potential biological hazard. Ensure you’re adequately trained before attempting any cleanup.
By integrating these steps into your cleaning procedures, you can create a safer environment for everyone involved. Remember, prevention is always better than cure.
Browse of full color catalog: Equipping oneself with quality safety gear is crucial for personal protection and the well-being of others. Our extensive range of safety equipment is designed to prevent accidents and safeguard employees’ health over time by reducing exposure to hazardous materials and tasks. Simple tools like gloves, masks, or protective goggles can make a profound difference!
Archaeologists recently discovered fragments of indoor toilets dating back 2,400 years in northwest China. This finding suggests that the concept of toilets with flush systems existed in China for over two millennia. Researchers identified the origin of the flush toilet in the ancient city of Yuegang, a capital of the Qin Kingdom and the early Han Dynasty. They were able to reconstruct an image of the toilets, consisting of a water pit connected to a bowl that servants would refill after each use. However, the upper part of the flush system is missing, preventing researchers from determining the position of the users during their natural needs.
Archaeologists described this discovery as a “luxury item,” suggesting that it was used by important members of society. Prominent figures in the Qin Kingdom, such as Qin Xiaogong and Qin Xiangong, likely used these toilets. This discovery represents the earliest and only known flush toilets in China to date.
Prior to this finding, the earliest evidence of indoor toilets dates back to the 16th century in England when Queen Elizabeth I is believed to have used a manual wooden flush. It was only in the late 19th century that porcelain was introduced by Thomas Twyford, a prominent figure in the hygiene movement. Since the end of World War II, toilets have become a significant fixture in residences. This discovery in China reveals that the invention of the flush toilet dates back much earlier than previously thought and may have independently originated in various regions of the world.
Automatic flush toilets are increasingly popular in public facilities and commercial buildings. These modern toilets offer a convenient and hygienic solution for users by eliminating direct contact with the bowl. However, the benefits of these flush toilets go beyond ease of use.
One of the main advantages of automatic flush toilets is their ability to prevent unpleasant odors. These toilets are equipped with an automatic flushing system that rinses the bowl after each use, quickly eliminating waste and preventing the accumulation of bacteria and germs, significantly reducing unpleasant odors.
Furthermore, some automatic flush toilets feature odor control systems that utilize chemicals or filters to neutralize odors. These systems are particularly useful in high-traffic public facilities.
In addition, automatic flush toilets help maintain restroom cleanliness. With no push buttons or levers, there is no need to touch the bowl to activate the flush, greatly reducing the risk of cross-contamination and improving hygiene.
Lastly, they are easy to install and maintain. They do not require additional plumbing and can be connected to existing water sources. Moreover, most models are equipped with an automatic cleaning system that removes limescale deposits and bacteria.
In conclusion, automatic flush toilets offer numerous advantages for users and building owners. They prevent unpleasant odors, keep restrooms clean and hygienic, and are easy to install and maintain. If you are considering upgrading your toilets, this could be an excellent option to consider.
Piccadilly Circus, London, England between 1890 and 1900
The last time you brushed your teeth, watered your plants or poured yourself a nice glass of cold tap water, did you stop for a moment to think you had instant access to clean water? safe? To understand how this marvel was created, you have to go back to the beginning of the 19th century in London.
Progress makes perfect even in London
At that time, the streets of London were full of trash and excrement, and the city’s rivers were heavily polluted. All this filth and misery was not just a nuisance to the nostrils of Londoners. It was downright deadly.
Cholera outbreaks in London
The contaminated rivers were particularly dangerous. For example, between 1848 and 1854, several cases of cholera broke out in London, killing thousands. No one knew what caused it.
But there was a sudden medical breakthrough. A medical doctor, Dr. John Snow (no connection to the popular series) was mapping the spread of the disease through the city, he realized that one of the sources of the outbreak was a water utility company that was distributing the water collected downstream of the outlets. He understood that to stop the spread of cholera one had to improve the water supply.
A revolution in water management
Snow’s discovery led to a revolution in sanitation. Soon after, sophisticated clean water systems were introduced, followed by filtration and chlorination. With each of these improvements, water quality and safety have improved.
Extract and free translation: Progress by Johan Norberg
A prevention kit
With virus season now, all the time (!), make sure you have the essentials for your users. Consult our kit at lalema.com specialist for cleaning supplies, sanitary supplies and cleaning products specialist in Montreal, designed to help you! Put it in your basket in 1 click!
When we talk about disinfection, we talk about the prevention and control of infection in the environment. Therefore, equipment used for respiratory therapy is considered semi-critical. The equipment must then be cleaned and disinfected properly between patients. The WHO gives us the proper maintenance of respiratory equipment in procedures to follow. The procedures are checklists in steps of a cycle. Let’s explore all the summarized steps up to the cycle finish. And yes, the cleaning step is before the disinfection step!
The external device surfaces must be wiped with a damp cloth or disposable wipe that is soaked in detergent and clean water. Then, remaining detergent residue must be wiped off with a dry lint-free cloth. A mechanical action (scrubbing/brushing) should be used to remove visible dirt deposits and calcifications.
4. Disinfect
4a. Physical disinfection – Heat for heat resistant equipement (steam/hot-water)
A high-level of physical disinfection can be achieved with steam (e.g. autoclaving at lower temperature) or hot-water at least 121°C. This is an inexpensive and effective method for sterilization or high-level disinfection.
4b. Chemical disinfection for plastic plus other parts that can be damaged by heat
b) If the disinfection needs to be with chemicals solutions, it should be performed in a well-ventilated area and away from patients. Use a disposable wipe or a fresh cloth that is soaked in a compatible disinfectant. Hydrogen peroxide 0.5% or ethanol 70-90%. Wipe from top to bottom and avoid contact with electrical connectors.
5. Dry equipment / Rinse equipment
a) Physical equipment often has a drying feature within the machine (e.g. washer, pasteurizer or autoclave). Following pasteurization, the wet equipment is typically dried in a hot-air drying cabinet or air-dried. Make sure to carefully inspect and ensure that no water is left in the equipment.
b) If a chemical solution was used for disinfection, rinse the equipment with sterile or clean water (i.e. water boiled for 5 mins and cooled down). It is preferred to use sterile water for rinsing off residual liquid chemical disinfectant from the respiratory device.
6. Store equipment in closed packages
Last step. Title says it all.
This was a summary of the Care, cleaning and disinfection of respiratory equipment in sterile services department’s article by World Health Organization.
This article is a free translation of WHO’s article.
Source: World Health Organization – https://www.who.int/publications/m/item/care-cleaning-and-disinfection-of-respiratory-equipment-in-sterile-services-department – https://www.who.int/images/default-source/health-topics/coronavirus/care-cleaning-disinfection-of-respiratory-equipment.tmb-479v.png?sfvrsn=14530f0b_1
When you read the title of this article, I imagine you had much the same reaction as I did. You must have thought that hygiene habits in the Wild West must be practically non-existent! Indeed, it is difficult to imagine the hygiene habits in the Wild West when we are currently living with COVID-19.
BRIEF HISTORY AND SETTLEMENT OF THE WILD WEST
The Wild West is the most famous period in the history of the American West. This period began in 1865 after the Civil War (between 1861 and 1865) and ended in 1895. Geographically speaking, the Wild West constitutes the territories located in the west of the Mississippi. Of course, there had been several waves of settlement in the West since the arrival of the first European settlers in America. The California Gold Rush of the 1840s was the first, and the call of Manifest Destiny (the idea that westward expansion was an American right and should be guaranteed) was the second. With the development of railroads in the 1860s and improved technology after the Civil War, the west became more accessible.
THE PRESENCE OF SOAP AND SHAMPOO
According to Frank Clifford, a cowboy and drifter who wrote a memoir about his life in the American Wild West, soap existed. He spoke of “soap-weed,” which Mexican women used to wash their hair. Made from the yucca plant, the soap left hair soft, clean and shiny. Many settlers used soap made from animal fat, although it was known to be harsh and irritate the skin. However, soap was not a priority. Body odor was considered a fact of life and many believed that having pores that were too clean exposed them to germs and disease.
As for shampoo, some people used soap-weed to wash their hair when they were lucky enough to have it. Another method was the use of whiskey, which was also used as a disinfectant. It was mixed with castor oil to wash the hair, which was then rinsed with rainwater or water softened with borax.
THE INEVITABLE DUST
Outside and inside, dust was inevitable in the Wild West. Frequent and devastating, dust storms covered entire towns with thick layers of dirt and grime. Sarah Raymond Herndon, author of American stories who traveled from Missouri to the Montana area in the 1860s, quotes: “Oh, the dust, the dust; it is terrible. I have never seen it half as bad; it seems to be almost knee-deep in places […] When we stopped, the boys’ faces were a sight; they were covered with all the dust that could stick on.” The presence of so much dust, of course, caused severe respiratory illness.
THE USEFULNESS OF THE SCARF
The scarf, one of the iconic aspects of cowboy attire, was an essential and used for a multitude of purposes. It was used to protect the mouth and nose from dust (like a mask), to protect the neck from the sun, the ears from the cold and much more.
COMMON TOWELS IN SALOONS
Towels in Wild West bars were used to wipe beer foam from customers’ mouths and beards. These shared towels were accessible to everyone near the bar counters. They were thus carriers of innumerable germs and diseases.
THE OUTHOUSES, A NIGHTMARE
The outhouses experience is, going into a shed built over a hole in the ground. When the hole was full, it was buried. Then, the structure would be moved to another hole. Outhouses attracted all kinds of insects because of the smell. These toilets were an easy way to catch diseases. There was no toilet paper, so people used leaves, corncobs and grass.
NOT BEING ILL WAS A MIRACLE
Eventually, due to the unsanitary conditions of the many people living in the Wild West, it was normal for diseases to affect the settlements on the American frontier. Cholera was one of the most important and was devastating to both settlers and Native Americans. Upon arrival at one camp, Sarah Raymond Herndon said, “There is no disease at all in the camp; it is wonderful how well we are doing. I hope it continues that way.”
So, it’s no surprise that the hygiene habits of that era were terrible. To learn more about the history and other facts of the Wild West, visit the sources below.
Loose translation of What Was Hygiene Like In The Wild West?
In the past, we have often lauded the advantage of microfiber for cleaning. This is repeated today, but with the use of a disposable microfiber as the first step in the disinfection process. Of course, we are talking about cleaning first, then disinfecting. However, the products highlighted in this article are compatible with common disinfectants. These products are Rubbermaid‘s Hygen single-use microfiber swabs and wipes.
WHAT IS A MICROFIBER AGAIN?
Microfiber is a synthetic textile fiber (polyester, polyamide or a mixture) that is very fine and light with a denomination which is less than one decitex. A microfiber (filament) is characterised by its small diameter, the nature of its fiber and its structure. Therefore, not all microfibers are the same or of the same quality. This revolutionary material has quickly become a must in the hygiene, health and automotive sectors. To know more about it, read this article, Spotlight on microfiber!
THE HYGEN LINE FROM RUBBERMAID
The Hygen line was designed specifically for the healthcare industry. It is an excellent option for any facility looking to improve its cleaning efficiency, especially during the COVID-19 period. The HYGEN disposable microfiber pad and wipe contribute to the area cleaning as the first step in the disinfection process.
Microfiber pads and wipes
They eliminate 99.7% or more of the viruses and bacteria tested to help improve cleaning efficiency. And this was tested with water only
Help reduce cross-contamination with disposable pads/wipes that encourage cleaning with new pads/wipes for each area or task
Built-in scrub strips are made of polyester to help effectively remove dirt
DEMONSTRATION OF THE DISPOSABLE MICROFIBER
Here’s a video from Rubbermaid Commercial Products. They demonstrated the benefit of their Hygen disposable microfiber wipe compared to a paper towel and a disinfectant wipe. They use a fluorescent marker to demonstrate and verify cleaning practices.
Thus, using this disposable microfiber with a disinfectant provides an added layer of assurance. They will clean and disinfect well your floors and surfaces by combining the microbe removal power of the microfiber with the disinfectant’s killing power.
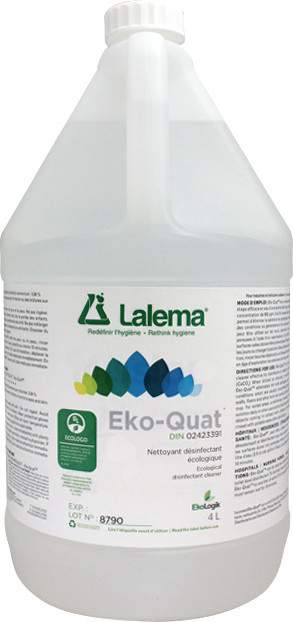
Today, April 22nd, is Earth Day. Since we are rambling about disinfection in this blog, it is much obliged to combine topics like disinfection and ecology! There is such a thing as an ecological disinfectant cleaner even if disinfectants are often associated with unpleasant toxicological profiles. For disinfectants to be considered environmentally friendly, they must meet the UL Environment 2794 standard (formerly EcoLogo DCC-166). Here at Lalema, we have the EKO-QUAT which is a neutral quaternary ammonium disinfectant cleaner and yes, it meets the UL Environment 2794 standards. We’ll get to know more about this product, but let us first understand what is an ecological disinfectant.
Defining ecological disinfectant
An ecological disinfectant is a disinfectant with a minimal risk to the environment. To be specific, the product must not contain carcinogen or phosphates, which is low in volatile organic compounds, non-toxic and readily biodegradable.
Ecological Disinfectant Cleaner EKO-QUAT
EKO-QUAT is a fourth generation neutral quaternary ammonium disinfectant cleaner. It eliminates dirt and the most resistant pathogens such as MRSA and VRE bacteria in conditions which are usually uncontrolled.
Its neutral PH makes it an ideal product to clean and disinfect any surface such as floors, ceramic, walls and counters with a sprayer, a cloth, a mop or a sponge.
This ecological disinfectant cleaner is versatile! Use it as a disinfectant, cleaner, deodorizer and toilet bowl disinfectant in several environments such as retirement homes, veterinary clinics or hospitals.
EKO-QUAT is an EcoLogo certified (UL 2794) ecological quaternary disinfectant (DIN 02423391).
Note that the EKO-QUAT is available in 2 formats: in manual dilution format (see 4 L image) and in Twist & Mixx format for Twist & Mixx dilution system.
Go with this ecological disinfectant cleaner to disinfect in a responsible way toward the environment! EKO-QUAT is a wise, sensible and versatile product that meets many standards! This disinfectant is as effective as non-ecological disinfectants based on the same technology.
Since the beginning of the pandemic, demands for electrostatic sprayers have exploded as an efficient way to disinfect key touch points and ensure environmental safety. While effective on a wide range of surfaces, it is important for cleaning teams to understand how it works, the cost considerations and the best facilities for using it. Therfore, this is a free translation of Cleanlink‘s article, What to know about electrostatic spraying.
What’s electrostatic disinfection
Electrostatic spraying or disinfection is the process of spraying an electrostatically charged mist onto surfaces and objects.
The electrostatic sprayer is electrically charged, allowing the specialized solution and disinfectants to envelop and evenly coat all types of surfaces. Designed to kill germs, bacteria and various types of viruses. It is a safe, fast, effective and non-contact application to limit the risk of cross-contamination.
How does it work?
Electrostatic sprayers use positively charged atomized particles to electromagnetically adhere disinfectant chemicals to negative target surfaces.
They use an electrode inside the sprayer to atomize the cleaning solution. The particles emerge from the nozzle as a spray that clings to any contact points it can find.
For example, no matter what angle it is used for surfaces disinfection, the droplets created by the electrostatic sprayer cause the disinfectant to cling to areas such as chairs, under tables or desks.
Although it is easy to apply, well-trained personnel is essential to ensure that the application process is optimal and safe for the staff.
What are the costs?
The cost generally depends on the type of facility as well as the size of the area to be treated.
In the long-term, electrostatic disinfection protects businesses from costly financial issues associated with contagious healthcare infections. It also reduces the costs associated with providing effective disinfectant solutions.
What types of properties are best suited for electrostatic disinfection?
This process is perfect for a variety of property types, including office buildings, healthcare facilities, shopping centers, industrial parks, condominiums, educational facilities, and government and hospitality projects. It also reaches a vast number of areas that highly covered by bacteria, otherwise difficult to access with standard cleaning methods by applying a uniform, solid coating to all surfaces.
Electrostatic disinfection is widely used in healthcare facilities as a safe and effective process in viral infection control programs, providing non-contact cleaning, thereby limiting the spread of bacteria.
When we talk about disinfection, we talk about the prevention and control of infection in the environment. Therefore, equipment used for respiratory therapy is considered semi-critical. The equipment must then be cleaned and disinfected properly between patients. The WHO gives us the proper maintenance of respiratory equipment in procedures to follow. The procedures are checklists in steps of a cycle. Let’s explore all the summarized steps up to the cycle finish. And yes, the cleaning step is before the disinfection step!
The external device surfaces must be wiped with a damp cloth or disposable wipe that is soaked in detergent and clean water. Then, remaining detergent residue must be wiped off with a dry lint-free cloth. A mechanical action (scrubbing/brushing) should be used to remove visible dirt deposits and calcifications.
4. Disinfect
4a. Physical disinfection – Heat for heat resistant equipement (steam/hot-water)
A high-level of physical disinfection can be achieved with steam (e.g. autoclaving at lower temperature) or hot-water at least 121°C. This is an inexpensive and effective method for sterilization or high-level disinfection.
4b. Chemical disinfection for plastic plus other parts that can be damaged by heat
b) If the disinfection needs to be with chemicals solutions, it should be performed in a well-ventilated area and away from patients. Use a disposable wipe or a fresh cloth that is soaked in a compatible disinfectant. Hydrogen peroxide 0.5% or ethanol 70-90%. Wipe from top to bottom and avoid contact with electrical connectors.
5. Dry equipment / Rinse equipment
a) Physical equipment often has a drying feature within the machine (e.g. washer, pasteurizer or autoclave). Following pasteurization, the wet equipment is typically dried in a hot-air drying cabinet or air-dried. Make sure to carefully inspect and ensure that no water is left in the equipment.
b) If a chemical solution was used for disinfection, rinse the equipment with sterile or clean water (i.e. water boiled for 5 mins and cooled down). It is preferred to use sterile water for rinsing off residual liquid chemical disinfectant from the respiratory device.
6. Store equipment in closed packages
Last step. Title says it all.
This was a summary of the Care, cleaning and disinfection of respiratory equipment in sterile services department’s article by World Health Organization.
This article is a free translation of WHO’s article.
Source: World Health Organization – https://www.who.int/publications/m/item/care-cleaning-and-disinfection-of-respiratory-equipment-in-sterile-services-department – https://www.who.int/images/default-source/health-topics/coronavirus/care-cleaning-disinfection-of-respiratory-equipment.tmb-479v.png?sfvrsn=14530f0b_1
Coronavirus – 2019-nCoV, WUHAN virus concept. 3D Rendering of coronavirus. 3D Illustration
Since the start of the fall, Quebec, as well as Canada, has been dealing with the second wave of Covid-19, the virus that turned the world as we knew it upside down and forced us to change our way of living drastically. By now, I’m sure that we’re all tired of hearing about it, however it’s important to remember that we are not yet done with Covid-19 and we should therefore be taking every precaution necessary to keep ourselves and our family members safe. That being said, with all the new information about the virus that keeps being thrown at us every day, it can be difficult to keep up with the symptoms, measures put in place and everything else related to Covid-19.
What are the symptoms and when should you stay home?
By now you’ve probably heard A LOT about the symptoms of Covid-19. However, due to a vast amount of information and misinformation, there is a lot of confusion about what exactly are the symptoms of the virus. So what are the the symptoms of Covid-19 and when should you stay home? This section will clarify any confusion you may have had!
The first set of symptoms are known as “Group A”. “Group A” symptoms are the symptoms most commonly associated with the virus. In the case of Covid-19, “Group A” symptoms include:
1) Fever 2) New or worsening cough 3) Difficulty breathing 4) Sudden unexplained loss of taste or smell
If you have any one of the “Group A” symptoms, you should stay home and get tested for Covid-19.
The second set of symptoms are known as “Group B”. These symptoms are less commonly associated with the virus, however still do occur. In the case of Covid-19, these symptoms include:
1) Sore throat 2) Muscle/joint pain 3) Intense fatigue 4) Headaches 5) Nausea, vomiting and/or diarrhea 6) Loss of appetite
In the case of “Group B”, you should stay home if you have two or more of these symptoms.
It is also important to note that you should also stay home if you have been in direct contact with someone who is Covid-19 positive, even if you do not present any symptoms.
Precautions
While there is still some confusion about the symptoms of Covid-19 and when you should be staying home, the precautions are a bit more straightforward. The main precautions to take in order to keep yourself safe are the following:
1) Hand hygiene 2) Maintain a distance of 2 meters (social distancing) 3) Wearing a mask 4) Staying home if symptomatic or if you have been in direct contact with someone who is Covid-19 positive.
Hand hygiene is one of the most important things, even when we are not living through a pandemic, and is often done incorrectly or not taken seriously enough.
Since the start of Covid-19, the use of protective equipment has become extremely important (and even mandatory in the case of face masks). After you are done with your face mask, and you are ready to take it off, it is important that you wash your hands both before and after taking it off. If you are also using gloves, it is really important to remember that gloves are not substitute for hand hygiene. Make sure that you wash your hands immediately after taking off your gloves. Do not skip steps with handwashing; it is critical in order to avoid touching your face with infected hands!
We are all tired of Covid-19 and all of the inconveniences it has brought to our lives. However, we are not out of the woods yet and it is important to keep practicing all of the safety precautions necessary. Let’s get through this second wave safely, by wearing a face mask, keeping a 2 meter distance and washing your hands often!
Hygen microfiber from Rubbermaid Commercial Products
The COVID-19 has led us to adopt new protocols to ensure patient and staff safety in healthcare facilities. Having said that, it is crucial to equip yourself with the right surface cleaning and disinfection products in healthcare facilities! What are the right products? How should you clean? Let’s explore them with the help from Rubbermaid Commercial Products, a world leader in the commercial cleaning industry! Of course, in these strange days, depending on the availability of some products, Lalema has suggestions as well ;)!
SURFACE CLEANING PRODUCTS
First of all, here are some products suggested by RCP for surface cleaning. Overall, most of them are available. Otherwise, we have replacements.
Recommended surface cleaning products
Hygen microfiber cloths – Rubbermaid Commercial Products’ all-purpose 16″ x 16″ HYGEN microfiber cloths remove 99.9% of the viruses and bacteria tested on surfaces.
Bowl Brush – This bowl brush has a plastic handle. The brush is made of polypropylene bristles. It is odor and stain resistant.
Toilet brush holder – This toilet brush holder is made of polypropylene. It is stain and odor resistant.
Bottle and Sprayer: Graduated bottle for inserting and spraying cleaning solutions.
Dry Wipes and MYOSAN TB Kit – Kit of dry wipes and MYOSAN TB designed to disinfect and eliminate microorganisms on hard surfaces. It should inactivate the new coronavirus SARS-CoV-2, the virus that causes COVID-19.
Dry Wipes and MYOSAN TB Kit
BEST PRACTICES
Second, as expectations for cleanliness and hygiene rise, facilities must ensure that they have an established surface cleaning and disinfection process. This includes regular cleaning of high-traffic areas. Below are the best surface cleaning practices used in hospitals around the world today.
CLEANING TIPS
Clean systematically, clockwise or counterclockwise – No surface is forgotten, this process saves time and is more ergonomic
Go from clean to dirty – This reduces the likelihood of the spread of infections and contaminants
Clean from the top to the bottom – Any dust or debris dislodged from the upper surface will naturally fall to the lower surfaces
Wipe in one direction (unidirectional wiping) – Unidirectional wiping ensures that the solution is applied over the entire surface, while circular wiping re-contaminates areas
Color Coding – Use single color wiping cloth for each zone. For example:
Red for high risk areas
Blue for mirrors
Yellow for baths and showers
8-SURFACE FOLDING METHODOLOGY
Finally, the 8-surface folding methodology! This is the 8-sided folding for microfiber cloths. It optimizes the use of the cloth while reducing the risk of cross-contamination during the cleaning process. Here are the steps:
8-SURFACE FOLDING METHODOLOGY
8-surface folding methodology by Rubbermaid Commercial Products
Start by opening a clean microfiber cloth
Fold the microfiber cloth in half
Fold the microfiber cloth into four pieces
Clean surfaces with both sides of the cloth exposed
Open the microfiber cloth once to change the sides
Fold over to expose both clean cleaning surfaces
Fully open the microfiber cloth when all four sides have been used
Repeat steps 2 to 7 to use all eight sides
In short, these tips are only general since we could have gone deeper into the details or in further checklists. However, the importance is to set up a methodology for surface cleaning and disinfection and to be equipped with the right products. Don’t forget to wear personal safety equipment! Let’s save the subject of floor cleaning for another day!
Lalema would like to thank and salute all the staff in the healthcare facilities for their services!
As we all know, the cleaning and disinfection of premises and surfaces have never been more critical with the COVID-19 pandemic. We often talk about disinfectant cleaners, but this time the focus is on microfiber cleaning cloths and tools. Since its commercial introduction, microfiber has been part of everyday life because of its reliability and effectiveness in cleaning and wiping.
WHAT IS A MICROFIBER CLOTH?
Microfiber is a synthetic textile fiber (polyester, polyamide or a mixture) that is very fine and light with a denomination which is less than one decitex. The decitex is a unit of measurement: 1 decitex = 1 g / 10 km of yarn. In fact, the term “microfiber” is used when 10 km of yarn weighs less than one gram.
A microfiber (filament) is characterised by its small diameter, the nature of its fiber and its structure. Therefore, not all microfibers are the same or of the same quality.
This revolutionary material has quickly become a must in the hygiene, health and automotive sectors. See how it is made.
THE “STORIES” OF MICROFIBER
No one is entirely sure where and when microfiber was developed. However, here are two interesting stories/versions:
According to Texasmicrofiber: “In the late 1950s, various spinning techniques were used to produce ultra-fine fibers. At that time, experiments had resulted in random length pieces, and the first real success occurred in Japan in the 1960s.
Dr. Miyoshi Okamoto and Dr. Toyohiko Hikota worked on this project to finally find microfibers suitable for industrial use. Ultrasuede fiber was one of the first success stories, and reached the market in the following decade. This led to an explosion in the value of microfibers in the textile sector. »
According to Maboutiqueecolo: “It would have been invented by the Swede Rudolf Nordine in the 1980s. The invention of microfiber is said to have come about by chance during the manufacture of “towels” for hairdressing salons. These were so absorbent that they could suck out the dye from freshly dyed hair. Nordine was quick to file a patent to protect this discovery. He was awarded a prize at the Lépine competition in 1998 for this invention at the International Invention Salon in Paris. »
USE AND EFFECTIVENESS
Microfiber has the power to clean and dust different kinds of surfaces without necessarily adding a cleaning product. This is why it can be seen as an organic and ecological product.
Microfiber cloths can be used dry or wet. First, when used dry, they attract dust and trap it in its microfibers (micro-filaments). Then, when wet (with or without a cleaning product), they trap grease and dirt.
During a pandemic, it is used with a disinfectant cleaner to disinfect surfaces. Lalema also suggests using a microfiber cloth with a tuberculocidal disinfectant. This Myosan TB starter kit is an example:
Myosan TB starter kit
There are several types of microfiber products for all kinds of surfaces: cloth, pad/mop, feather duster, towel, etc.
HOW TO TAKE CARE OF THEM?
Microfibers are economical and environmentally friendly. They can be reused up to 500 times. “Avez-vous le pouce microfibre?” by Kim Beauregard is an article about the maintenance of microfibers. Unfortunately, it is in French only. But here are key elements:
Wash the microfibers separately from other textiles and items
Use a small amount of liquid laundry detergent while washing.
Do not use a softening agent
Wash them in cold or room water
Dry the microfibers at low temperature or without heat
So, microfiber is a revolutionary material in the world of cleaning. Whether it is used as a cloth, a pad/mop or a duster, it is the ultimate cleaning tool for cleaning and wiping in many sectors. Finally, microfiber cloths can replace disposable wipes. Use them with a disinfectant product to disinfect the surfaces in your environment.
Wearing a mask has become our new habit during the pandemic situation. Therefore, let us explore how to clean and remove a mask or a face cover. In fact, there is more than one way to clean a mask including some additional precautions. So, let’s go over some methods!
CLEAN IN THE LAUNDRY
First, according to Health Canada, if you plan to rewear a reusable (non-medical cloth) mask, we suggest cleaning it by putting it directly in the laundry. It can be washed with other items using a hot water cycle. As for the cleaning product to use, regular laundry soap should be fairly effective, according to the New York Times. In addition, according to Le Parisien, washing with hot water should be at least 60° C for 30 minutes.
Laundry machine
CLEAN BY HAND
Second, following what was shared in the New York Times, experts have said that hand washing face covers in a sink works as well. You should lather the soap and rub the mask for 20 seconds. It’s a similar process to hand washing.
Hand laundry kit
SOAK WITH HOT SOAP
Third, soak the mask in warm soapy water. This method comes from Professor Golemi-Kotra, an expert in molecular biology in Toronto York University. She said the best way to clean a cloth mask would be to soak it in hot, soapy water for at least an hour.
DRY THE MASK
Afterwards, dry the mask completely in the dryer or by hanging it.
Drying masks
ELIMINATE A MASK
Finally, we dispose a mask that cannot be washed when it is wet, soiled or wrinkled. So just throw the mask properly in a lined trash can. It’s the same for a damaged reusable mask or a face cover at the end of its life span. Do not leave your mask lying anywhere else.
In short, these were ways to clean a face cover. Which method is right for you? Above all, do not forget to wash your hands properly before putting on a mask and also after removing it! Also, disinfect your surfaces as well!
Christmas is right around the corner and who isn’t excited? I mean, who doesn’t like relaxing, going to parties, eating A LOT of food and getting to sleep in?
But, as great as Christmas celebrations and parties are, they are usually synonymous with mess. Nobody likes the big clean up after Christmas holidays, and yet most people leave it to the last minute. Have no fear though, we are here to rescue you with a simple, 12 days of Christmas cleaning plan so that you can do a little bit of cleaning every day instead of at the end your vacation.
So without further-ado, let’s jump right into your 12 day cleaning plan!
12 Days of Christmas Cleaning Plan
Day 1) Start with the kitchen, more specifically any dishes that have been lying around in your kitchen for a while. Chances are, your kitchen will see a lot of action over the holidays, since food will be prepared and served in this room. Tidy up any dishes that you have been trying to avoid, and put them away once cleaned.
Day 2) Back in the kitchen for day 2! Today the focus will be on wiping all the counter tops and the stove and cleaning the kitchen table. Whether you have wine stains or cookie dough stuck on your counters, this day will make sure that your whole kitchen has been cleaned!
Day 3) You know when all those messy boots cover the floor at the front entrance of your house, and they drip snow and slush all over? Day 3 is reserved for you to clean that mess up! Depending on the type of floors in your house, you can either mop, wipe or vacuum.
Day 4) Day 4 is reserved for cleaning up any wrapping paper, gift bags or packaging that was left around your house. Depending on the condition of the wrapping, you can either throw it away or store used bags and leftover wrapping paper somewhere for next year.
Day 5) Clean the dining room. While the food was prepared and served in the kitchen, the eating probably took place in your dining room. If that was the case, Day 5 is to clean up your dining room. Wipe up any food or crumbs that may be on the table and mop or vacuum the floor.
Day 6) Tackle the bathrooms, or at least the bathroom that was the most used by your guests. Nobody likes to clean bathrooms, but it needs to be done, and even more so after the holidays when they have been used by many different people. Make sure that you sanitize the countertops and sinks, clean the toilets and mop the floor. And, as we have already seen on this blog, avoid cross-contamination by using different wipes and equipment for different parts of the bathrooms.
Day 7) Take this day to catch up on your laundry. You’ve attended a lot of parties and, therefore, probably wore a lot of clothes, so now it’s time to catch up on cleaning them! Also, don’t forget about washing linens, like sheets and pillow cases, especially if you had guests using your guest bedrooms.
Day 8) Up next is the living room. Whether you watched Holiday movies with your family or spent lazy days on the couch with your kids, chances are you spent a lot of time in your living room relaxing over the holidays. Now it’s time to pick up those popcorn crumbs and place those pillows!
Day 9) Clean your master bedroom. You’ve already done the linens and pillow cases on laundry day, so this step should be relatively easy. Pick up any trash lying on the ground, dust the wardrobes and night tables and try to store things away like clothes and books.
Day 10) If you have other bedrooms, Day 10 is to clean all the other rooms in your house. Same thing as for the master bedroom, you’ve already done the linens, so all you have to do is clean the rest of the room!
Day 11) It’s almost time to go back to work and most of the parties are over now. Check your fridge and see what leftover party food you can throw away. Wash any containers that were used, so that your sink doesn’t get cluttered!
Day 12) Put away your Christmas tree and decorations. Probably the saddest day out of our 12 day cleaning plan, because putting away the Christmas tree means that the holidays are officially over! But the earlier you put it away just means that you won’t have to do it in January once you’re back in the routine of work and school. Also, don’t forget to sweep up underneath where the tree was after everything is out of the way.
So there you have it, cleaning up after the holidays made simple! And if you think you’re missing any products that will be necessary for your holiday cleaning, we’re here for you! Feel free to consult our website and check out our product offerings:
You have probably already heard that cellphones are some of the dirtiest things that you can touch. What you probably don’t know is just how bad they are. According to Patrick Boshell (2013), cellphones carry about 25,000 germs per square inch or, in other words, 10 times more bacteria than a toilet seat.
Source: Pexels
Cellphones come with us wherever we go, even the bathroom! So it’s no surprise that it is one of the dirtiest objects to come into contact with. Although a lot of the bacteria found on your phone won’t make you sick, studies have found that some pretty dangerous pathogens can be found on your phone, such as MRSA or E. Coli.
So, what can you do to protect yourself against the potentially harmful bacteria on your phone?
How to keep your cellphone clean
The following is a list of recommendations to help keep your cellphone bacteria-free (or as close to it as possible):
Wash your hands frequently and properly. It may seem obvious, but many people don’t pay attention to hand-washing guidelines, which results in hands that were not washed properly carrying bacterias that will touch and contaminate your phone. Hand-washing is probably the most important thing you can do to keep your phone clean, since the majority of the bacteria is transferred from your hands.
Keep your phone out of the bathroom. Bathrooms are some of the dirtiest places that you go to. Using your phone while you’re in the bathroom exposes it to the bacteria lurking in stalls.
Wipe down your phone. Time magazine recommends two options for cleaning your cellphones: (1) wipe the phone with a microfibre cloth or (2) for a deeper clean, combine water and alcohol and dip a cloth in the mix and wipe down your screen.
For more information, take a look at this video below:
It was a pleasure to chat with some of you about current practice in environmental hygiene regarding infection control.
We hope you liked Ali-Flex RTU, our low odor, non-corrosive, broad spectrum and ready to use disinfectant cleaner. There is a great potential for improvement in the field of environmental hygiene and we are dedicated to it.
We look forward to hearing from you, but in the meantime, with best regards we remain.
The Ali-Flex Team (Manon, John and Remi)
PS If you want to know more about Ali-Flex RTU, visit our main web site.
Infection prevention and control Canada will hold its annual conference in just a month. This year it will take place in beautiful Victoria, BC. The theme surfing waves of change promise to bring a wind of new approaches and effective solutions to enhance the practice of ICPs. Key opinion leaders and other highly influential speakers will provide a tsunami of information through presentation and multiple discussions. With a special focus on compliance reporting on environmental hygiene and hand hygiene, this conference might inspire a real wave of change.
IPAC Canada 2015
IPAC is also an excellent opportunity to meet with the industry leader in the broad field of infection prevention. Whether you are looking for new environmental hygiene tools, a better software to monitor your antimicrobial stewardship program or hand hygiene audit solutions, key industries will be there. It will also be the perfect occasion to get familiar with the Ali-Flex brand.
Will you be on board to meet the rip tides of change ? We will! Meet us at booth 72!